您是否要创建业务网站目录?Web目录是一种流行的在线商业理念…
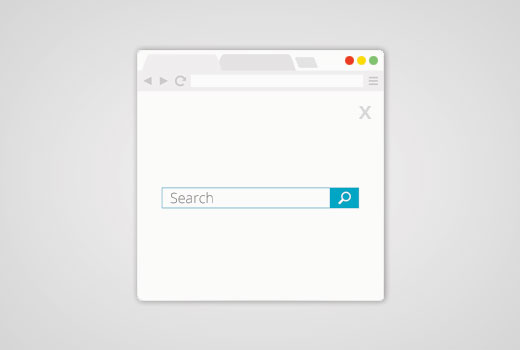
最近,一位读者问我们是否可以编写有关如何在WordPress中添加全屏搜索覆盖图的教程。您可能已经在Wired等热门网站上看到了这一点。当用户单击搜索图标时,搜索框将打开并覆盖整个屏幕,从而可以改善移动设备上的用户体验。在本文中,我们将向您展示如何在WordPress中添加全屏搜索覆盖。
全屏搜索正逐渐成为一种趋势,因为它极大地改善了移动用户的搜索体验。由于移动屏幕非常小,通过提供全屏覆盖,您可以使用户轻松在您的网站上键入和搜索。
当我们第一次收到此教程请求时,我们知道它需要一些代码。WPBeginner的目标是使事情尽可能简单。
一旦完成了教程的编写,我们就意识到它太复杂了,应该将其包装到一个简单的插件中。
为简单起见,我们创建了一个视频教程,介绍如何添加全屏搜索覆盖图,您可以在下面观看。
但是,如果您只想按照文本说明进行操作,则可以按照我们的逐步指南进行操作,以了解如何在WordPress中添加全屏搜索覆盖图。
在WordPress中添加全屏搜索叠加
您需要做的第一件事是安装并激活WordPress全屏搜索覆盖插件。有关更多详细信息,请参阅有关如何安装WordPress插件的分步指南。
WordPress全屏覆盖搜索插件可以直接使用,并且没有可供您配置的设置。
您只需访问您的网站,然后单击搜索框即可查看该插件的使用情况。
请注意,该插件可使用默认的WordPress搜索功能。它也可以与SearchWP一起使用,SearchWP是一个高级插件,可以大大改善默认的WordPress搜索。
不幸的是,此插件不适用于Google自定义搜索。
自定义全屏搜索覆盖
WordPress全屏搜索覆盖插件带有其自己的样式表。为了更改搜索叠加的外观,您将必须编辑插件的CSS文件或在CSS中使用!important。
首先,您需要使用FTP客户端连接到您的网站。如果您不熟悉FTP,请查看我们的指南,了解如何使用FTP将文件上传到WordPress。
连接后,您需要找到插件的CSS文件夹。您可以在以下路径下找到它:
yourwebsite.com/wp-content/plugins/full-screen-search-overlay/assets/css/
您会full-screen-search.css在css文件夹中找到一个文件。您需要将此文件下载到计算机。
打开文件,您刚刚在纯文本编辑器(如记事本)中下载了该文件。您可以对此文件进行任何更改。例如,我们想更改背景和字体颜色以匹配我们的演示网站。
/*** Reset* - Prevents Themes and other Plugins from applying their own styles to our full screen search*/#full-screen-search,#full-screen-search button,#full-screen-search button.close,#full-screen-search form,#full-screen-search form div,#full-screen-search form div input,#full-screen-search form div input.search { font-family: Arial, sans-serif; background:none; border:0none; border-radius:0; -webkit-border-radius:0; -moz-border-radius:0; float:none; font-size:100%; height:auto; letter-spacing:normal; list-style:none; outline:none; position:static; text-decoration:none; text-indent:0; text-shadow:none; text-transform:none; width:auto; visibility:visible; overflow:visible; margin:0; padding:0; line-height:1; box-sizing:border-box; -webkit-box-sizing:border-box; -moz-box-sizing:border-box; -webkit-box-shadow:none; -moz-box-shadow:none; -ms-box-shadow:none; -o-box-shadow:none; box-shadow:none; -webkit-appearance:none; transition: none; -webkit-transition: none; -moz-transition: none; -o-transition: none; -ms-transition: none;}
/*** Background*/#full-screen-search { visibility: hidden; opacity: 0; z-index: 999998; top: 0; left: 0; width: 100%; height: 100%; background: #1bc69e;
/** * Add some CSS3 transitions for showing the Full Screen Search */ transition: opacity 0.5s linear;}
/*** Display Full Screen Search when Open*/#full-screen-search.open { /** * Because we're using visibility and opacity for CSS transition support, * we define position: fixed; here so that the Full Screen Search doesn't block * the underlying HTML elements when not open */ position: fixed; visibility: visible; opacity: 1;}
/*** Search Form*/#full-screen-search form { position: relative; width: 100%; height: 100%;}
/*** Close Button*/#full-screen-search button.close { position: absolute; z-index: 999999; top: 20px; right: 20px; font-size: 30px; font-weight: 300; color: #999; cursor: pointer;}
/*** Search Form Div*/#full-screen-search form div { position: absolute; width: 50%; height: 100px; top: 50%; left: 50%; margin: -50px00-25%;}
/*** Search Form Input Placeholder Color*/#full-screen-search form div input::-webkit-input-placeholder { font-family: Arial, sans-serif; color: #ccc;}#full-screen-search form div input:-moz-placeholder { font-family: Arial, sans-serif; color: #ccc;}#full-screen-search form div input::-moz-placeholder { font-family: Arial, sans-serif; color: #ccc;}#full-screen-search form div input:-ms-input-placeholder { font-family: Arial, sans-serif; color: #ccc;}
/*** Search Form Input*/#full-screen-search form div input { width: 100%; height: 100px; background: #eee; padding: 20px; font-size: 40px; line-height: 60px; /* We have added our own font color here */ color:#50B0A6; }
在此代码中,我们仅在第62行更改了背景颜色,并在第150行添加了字体颜色。如果您对CSS感到满意,那么也可以随时更改其他样式规则。
完成后,您可以使用FTP将文件上传回插件的CSS文件夹。现在,您可以通过访问网站来查看更改。
重要的提示:
如果您在自己的主题中使用它,那么最好使用!important标签,以便插件更新不会覆盖任何更改。
对于开发人员和顾问,您也可以只重命名插件并将其捆绑为主题或服务的一部分。
我们之所以创建此插件,是因为对于初学者来说,编写本教程的所有其他方式都太复杂了。
相关内容